之前已经部署了Flask到在线环境中了:
【已解决】CentOS服务器中搭建Python的Flask的REST API
现在在本地已经搭建和调试好了前端页面,用于演示产品demo:
接着需要把本地的前端页面部署到在线的Flask环境中。
flask 部署 nginx
Flask+uWSGI+Nginx 部署笔记 – 后端 – 掘金
在Nginx上部署Python Flask应用 – 后端 – 掘金
阿里云部署 Flask + WSGI + Nginx 详解 – Ray Liang – 博客园
在 Ubuntu 上使用 uWSGI 和 Nginx 部署 Flask 项目 – 聪聪的个人网站
CentOS 下用 Nginx 和 uwsgi 部署 flask 项目 – EyEder的专栏 – SegmentFault 思否
flask 部署 nginx centos
CentOS 7 + Python Flask + MySQL + Nginx 配置 | iAcn’s Blog
centos+flask+uwsgi+nginx+supervisor部署小结 – CSDN博客
然后需要去搞清楚,此处的Flask中static的各种html,css,js,如何部署到服务器中
是放在Flask的static文件夹中
还是单独放在nginx的某个目录下
flask static nginx centos
centos deploy flask static files nginx
flask 部署静态文件 nginx
python – How to serve Flask static files using Nginx? – Stack Overflow
Python的Flask框架及Nginx实现静态文件访问限制功能_python_脚本之家
去看看默认配置:
<code>[root@xx-xx-01 conf.d]# cat /etc/nginx/nginx.conf
# For more information on configuration, see:
#   * Official English Documentation: http://nginx.org/en/docs/
#   * Official Russian Documentation: http://nginx.org/ru/docs/

user nginx;
worker_processes auto;
error_log /var/log/nginx/error.log;
pid /run/nginx.pid;

# Load dynamic modules. See /usr/share/nginx/README.dynamic.
include /usr/share/nginx/modules/*.conf;

events {
    worker_connections 1024;
}

http {
    log_format  main  '$remote_addr - $remote_user [$time_local] "$request" '
                      '$status $body_bytes_sent "$http_referer" '
                      '"$http_user_agent" "$http_x_forwarded_for"';

    access_log  /var/log/nginx/access.log  main;

    sendfile            on;
    tcp_nopush          on;
    tcp_nodelay         on;
    keepalive_timeout   65;
    types_hash_max_size 2048;

    include             /etc/nginx/mime.types;
    default_type        application/octet-stream;

    # Load modular configuration files from the /etc/nginx/conf.d directory.
    # See http://nginx.org/en/docs/ngx_core_module.html#include
    # for more information.
    include /etc/nginx/conf.d/*.conf;

    server {
        listen       80 default_server;
        listen       [::]:80 default_server;
        server_name  _;
        root         /usr/share/nginx/html;

        # Load configuration files for the default server block.
        include /etc/nginx/default.d/*.conf;

        location / {
        }

        error_page 404 /404.html;
            location = /40x.html {
        }

        error_page 500 502 503 504 /50x.html;
            location = /50x.html {
        }
    }

# Settings for a TLS enabled server.
#
#    server {
#        listen       443 ssl http2 default_server;
#        listen       [::]:443 ssl http2 default_server;
#        server_name  _;
#        root         /usr/share/nginx/html;
#
#        ssl_certificate "/xxx/server.crt";
#        ssl_certificate_key "/xxx/server.key";
#        ssl_session_cache shared:SSL:1m;
#        ssl_session_timeout  10m;
#        ssl_ciphers HIGH:!aNULL:!MD5;
#        ssl_prefer_server_ciphers on;
#
#        # Load configuration files for the default server block.
#        include /etc/nginx/default.d/*.conf;
#
#        location / {
#        }
#
#        error_page 404 /404.html;
#            location = /40x.html {
#        }
#
#        error_page 500 502 503 504 /50x.html;
#            location = /50x.html {
#        }
#    }

}

[root@xxx-general-01 conf.d]#
</code>Nginx 踩坑 —— 自定义位置静态资源 | xlui 的个人博客
Make Python Faster with NGINX: Web Serving & Caching
现在需要先确定,静态文件的部署的逻辑:
目前暂定用:
直接把静态文件,不通过Flask,而是直接放到nginx的某个文件夹下面
然后网站上访问:
http://47.96.131.109/robotDemo
然后即可访问静态页面
所以此处和Flask没有关系了。
就只是:
centos nginx 配置
nginx 指定目录
nginx 指定 root
Nginx静态服务配置—详解root和alias指令 – 简书
nginx的location、root、alias指令用法和区别 – 运维与架构 – nginx.cn
nginx虚拟目录设置 alias 和 root – CSDN博客
Nginx虚拟目录alias和root目录 – 散尽浮华 – 博客园
结果把配置文件:
robotDemo.conf
<code>server {
    listen 80;
    server_name xxx.109;
    root /xxx/robotDemo;

    location / {
        proxy_pass http://127.0.0.1:port; # 反向代理 Gunicorn 本地的服务地址
        proxy_set_header Host $host;
        proxy_set_header X-Forwarded-For $proxy_add_x_forwarded_for;
    }
}
</code>
放到:
/etc/nginx/conf.d
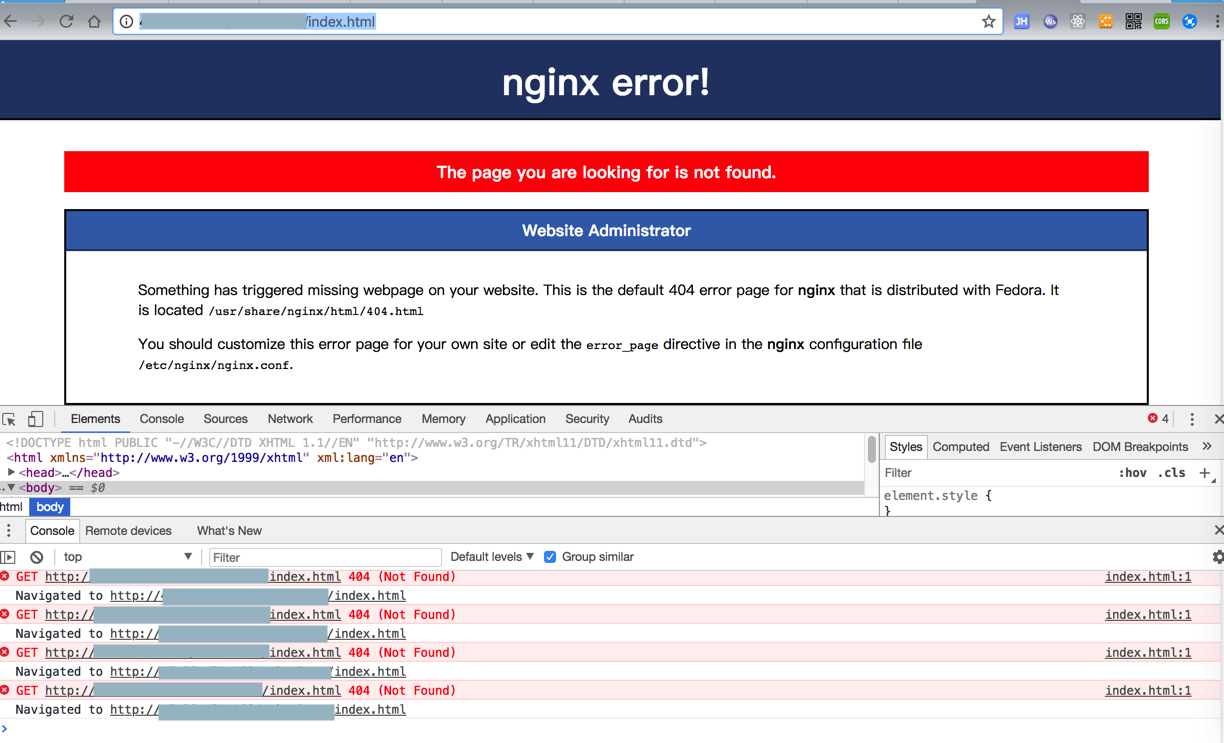
之后,结果访问主页就失败了:
http://x.x.x.109/

“Not Found
The requested URL was not found on the server. If you entered the URL manually please check your spelling and try again.”
还是先去搞清楚:
【基本解决】nginx的配置参数含义和各个配置文件路径之间的关系
然后试了半天,比如:
<code>location /robotDemo/ {
    root /root/xxx/www;
}
</code>
放到:
<code>[root@xxx-general-01 conf.d]# pwd
/etc/nginx/conf.d
[root@xxx-general-01 conf.d]# ll
total 4
-rw-r--r-- 1 root root 67 May  2 14:57 robotDemo_simple.conf
</code>
结果访问:
http://x.x.x.x/xxx/index.html
还是出错,不过至少是:
至少是找到nginx了。
算了,直接修改根目录的配置,看看是否生效吧。
<code>vi /etc/nginx/nginx.conf
     38     server {
     39         listen       80 default_server;
     40         listen       [::]:80 default_server;
     41         server_name  _;
     42         # root         /usr/share/nginx/html;
     43         root         /xxx/www;
</code>
重启nginx,结果forbidden了:
【已解决】CentOS中修改nginx配置中的root根目录后访问出错403 Forbidden
【总结】
至此,算是基本上完成了,把本地的静态文件部署到在线CentOS的nginx中了。
暂时是没有用到Flask。
后续如果用到,需要把这些静态文件整合到Flask的static文件夹中,再说。
此处整体流程是:
1.去centos中安装nginx
<code>yum -y install nginx
</code>
2.修改nginx配置:
把
/etc/nginx/nginx.conf
中的root改为自己的目录:
<code>        # root         /usr/share/nginx/html;
        root         /xxxx/www;
</code>
注意:
需要确保此处的目录的所有层级都有读和写的权限
详细点说是:
此处,需要确保知道当前nginx的master和worker的用户是谁,此处通过:
<code>ps -ef | grep nginx
</code>
看出好像是:master是root,worker是(/etc/nginx/nginx.conf中指定的)nginx用户
然后确保你的目录的所有的层级,此处的
<code>/root
/root/xxx
/root/xxx/yyy
/root/xxx/yyy/www
</code>
对于上述的nginx用户,都有:
读=read=r=4
执行=execute=x=1
的权限。
一个简单的方法是:
给上述目录,分别执行:
<code>chmod a+rx xxx
</code>
添加上读和执行的权限。
注:我此处就是开始时没有注意到:
/root没有读和运行的权限
导致403错误没有解决。
3.把html等文件放到对应目录下
<code>[root@xxx-general-01 www]# pwd
/root/xxx/yy/www
[root@xxx-general-01 www]# ll
total 24
-rwxr-xr-x 1 root root 3650 May  2 15:56 404.html
-rwxr-xr-x 1 root root 3693 May  2 15:56 50x.html
-rwxr-xr-x 1 root root 3700 May  2 15:56 index.html
-rwxr-xr-x 1 root root  368 May  2 15:56 nginx-logo.png
-rwxr-xr-x 1 root root 2811 May  2 15:56 poweredby.png
drwxrwxrwx 6 root root 4096 May  2 14:18 robotDemo
[root@xx-general-01 www]# cd zzz/
[root@xx-general-01 zzz]# ll
total 28
drwxrwxrwx 4 root root 4096 Apr 28 18:20 css
drwxrwxrwx 2 root root 4096 Nov 12  2014 fonts
drwxrwxrwx 2 root root 4096 Apr 27 09:41 img
-rwxrwxrwx 1 root root 5666 May  2 13:45 index.html
drwxrwxrwx 5 root root 4096 Apr 28 17:23 js
</code>
4.重启或重载nginx:
<code>systemctl reload nginx
systemctl restart nginx
</code>
即可生效。
转载请注明:在路上 » 【已解决】把本地前端页面部署到在线Flask环境中