折腾:
【已解决】把ReactJS-AdminLTE的页面编译打包成生产环境版本
期间,基本解决了ReactJS-AdminLTE的页面集成,现在需要去想办法打包编译为生产环境。
之前自己已经通过:
react-hot-boilerplate/react-hot-boilerplate/package.json
“scripts”: { “dev”: “node server.js”, “lint”: “eslint src”, “build”: “rm -rf ./build && webpack -p –progress –colors” }, |
然后:
➜ react-hot-boilerplate git:(master) ✗ npm run build > [email protected] build /Users/crifan/dev/dev_root/daryun/Projects/xxx/sourcecode/web/AdminManagement/reference/react-hot-boilerplate/react-hot-boilerplate > rm -rf ./build && webpack -p –progress –colors Hash: ad34bc1e5ddc046d053f Version: webpack 1.15.0 Time: 9440ms Asset Size Chunks Chunk Names vendor.bundle.js 1.34 MB 0 [emitted] vendor index.js 10 MB 1 [emitted] index [0] multi vendor 40 bytes {0} [built] + 807 hidden modules |
但是离完整的production打包还差很多:
1.根据环境变量是development还是production,去决定是否加上对应的plugin以及其他逻辑
2.如何把现在的html文件拷贝到build文件夹中
3.其他的production时,需要优化的地方
先去处理第一个,参考之前的项目,去试试
webpack node_env production
此处,还是看到了Webpack都升级到3了,而此处自己的webpack都还是1.x的,所以:
还是先去:
【已解决】把ReactJS项目react-hot-boilerplate中的Webpack 1升级到Webpack 3
javascript – Can’t Set NODE_ENV to production with webpack – Stack Overflow
Make your own React production version with webpack | Topheman JS
module.exports = { //… plugins:[ new webpack.DefinePlugin({ ‘process.env’:{ ‘NODE_ENV’: JSON.stringify(‘production’) } }), new webpack.optimize.UglifyJsPlugin({ compress:{ warnings: true } }) ] //… } |
Jonny Reeves – Simple Webpack Prod and Dev Config
var webpack = require(“webpack”); var isProd = (process.env.NODE_ENV === ‘production’); // Conditionally return a list of plugins to use based on the current environment. // Repeat this pattern for any other config key (ie: loaders, etc). function getPlugins() { var plugins = []; // Always expose NODE_ENV to webpack, you can now use `process.env.NODE_ENV` // inside your code for any environment checks; UglifyJS will automatically // drop any unreachable code. plugins.push(new webpack.DefinePlugin({ ‘process.env’: { ‘NODE_ENV’: process.env.NODE_ENV } })); // Conditionally add plugins for Production builds. if (isProd) { plugins.push(new webpack.optimize.UglifyJsPlugin()); } // Conditionally add plugins for Development else { // … } return plugins; } // Export Webpack configuration. module.exports = { plugins: getPlugins() }; |
node.js – webpack里set NODE_ENV=production,react依然有warning? – SegmentFault
后来去:
【已解决】把react-hot-boilerplate改为用最新webpack-dev-server去调试代码
然后现在感觉是:已经基本上实现打包为生产环境的代码了
【总结】
相关的配置如下:
react-hot-boilerplate/react-hot-boilerplate/package.json
{ “name”: “react-hot-boilerplate”, “version”: “1.0.0”, “description”: “Boilerplate for ReactJS project with hot code reloading”, “scripts”: { “dev”: “cross-env NODE_ENV=development webpack-dev-server –progress –colors –hot –inline –open”, “lint”: “eslint src”, “build”: “rm -rf build && mkdir -p build && cp index.html build && cross-env NODE_ENV=production webpack -p –progress –colors” }, 。。。 “homepage”: “https://github.com/gaearon/react-hot-boilerplate”, “devDependencies”: { “babel-core”: “^6.0.20”, “babel-eslint”: “^4.1.3”, “babel-loader”: “^6.0.1”, “babel-preset-es2015”: “^6.0.15”, “babel-preset-react”: “^6.0.15”, “babel-preset-stage-0”: “^6.0.15”, “eslint”: “^1.10.3”, “eslint-plugin-react”: “^3.6.2”, “express”: “^4.13.4”, “webpack”: “^3.5.4”, “webpack-dev-server”: “^2.7.1” }, “dependencies”: { “adminlte-reactjs”: “^1.0.6”, “cross-env”: “^5.0.5”, “css-loader”: “^0.28.4”, “echarts-for-react”: “^1.4.4”, “jquery”: “^3.2.1”, “react”: “^15.4.0”, “react-dom”: “^15.4.0”, “react-hot-loader”: “^3.0.0-beta.7”, “style-loader”: “^0.18.2” } } |
react-hot-boilerplate/react-hot-boilerplate/webpack.config.js
var path = require(‘path’); var webpack = require(‘webpack’); // const ENV = process.env.NODE_ENV || ‘development’; var isProd = (process.env.NODE_ENV === ‘production’); console.log(`process.env.NODE_ENV=${process.env.NODE_ENV}, isProd=${isProd}`); //process.env.NODE_ENV=development, isProd=false let commonPlugins = [ // new webpack.ProvidePlugin({ // $: ‘jquery’, // ‘window.jQuery’: ‘jquery’, // jQuery: ‘jquery’, // ‘window.$’: ‘jquery’, // }), new webpack.optimize.CommonsChunkPlugin({ name: ‘vendor’, filename: ‘vendor.bundle.js’ }), // new webpack.HotModuleReplacementPlugin() ]; if (isProd) { // Note: current not add UglifyJsPlugin for production for: // when webpack -p, it will auto added UglifyJsPlugin, then omit here UglifyJsPlugin settings // commonPlugins.push( // new webpack.optimize.UglifyJsPlugin({ // minimize: true // }) // ); } module.exports = { entry: { index: ‘./src/index.js’, vendor : [ // ‘webpack-hot-middleware/client’, ‘react-hot-loader/patch’, ‘./src/adminlte_app.js’ ], }, output: { // path: path.join(__dirname, ‘public’), // path: path.join(__dirname, ‘build’), path: path.resolve(__dirname, ‘build’), // filename: ‘bundle.js’, filename: ‘[name].js’, // filename: ‘./build/[name].js’, // publicPath: ‘/public/’ // publicPath: ‘/public’ // publicPath: ‘/assets/’ // publicPath: ‘http://localhost:3000/public/’ }, // devtool: isProd ? ‘cheap-module-source-map’ : ‘eval’, devtool: isProd ? ‘false’ : ‘eval’, devServer:{ // hot: true, // contentBase: path.join(__dirname, ‘dist’), contentBase: path.resolve(__dirname, ‘build’), // publicPath: path.resolve(__dirname, ‘build’), compress: true, port: 3000, historyApiFallback: true }, plugins: commonPlugins, module: { // loaders: [ rules: [ { test: /\.js$/, //loaders: [‘react-hot-loader’, ‘babel-loader’], // use: [‘react-hot-loader’, ‘babel-loader’], use: [‘babel-loader’], // include: path.join(__dirname, ‘src’) }, { test: /\.css$/, // loaders: [‘style-loader’, ‘css-loader’], use: [‘style-loader’, ‘css-loader’], // include: path.join(__dirname, ‘src’) } ] } }; |
然后对应的html
react-hot-boilerplate/react-hot-boilerplate/index.html
是:
<!doctype html> <html> <head> <meta charset=”utf-8″> <meta http-equiv=”X-UA-Compatible” content=”IE=edge”> <title>Sample App</title> <!– Tell the browser to be responsive to screen width –> <meta content=”width=device-width, initial-scale=1, maximum-scale=1, user-scalable=no” name=”viewport”> <!– Bootstrap 3.3.5 –> <link rel=”stylesheet” href=”https://maxcdn.bootstrapcdn.com/bootstrap/3.3.7/css/bootstrap.min.css”> <!– Font Awesome –> <link rel=”stylesheet” href=”https://maxcdn.bootstrapcdn.com/font-awesome/4.4.0/css/font-awesome.min.css”> <!– Ionicons –> <link rel=”stylesheet” href=”https://code.ionicframework.com/ionicons/2.0.1/css/ionicons.min.css”> <!– DataTables –> <link rel=”stylesheet” href=”https://cdnjs.cloudflare.com/ajax/libs/datatables/1.10.15/css/dataTables.bootstrap.min.css”> <!– Theme style –> <link rel=”stylesheet” href=”https://cdnjs.cloudflare.com/ajax/libs/admin-lte/2.3.11/css/AdminLTE.min.css”> <!– AdminLTE Skins. Choose a skin from the css/skins folder instead of downloading all of them to reduce the load. –> <link rel=”stylesheet” href=”https://cdnjs.cloudflare.com/ajax/libs/admin-lte/2.3.11/css/skins/_all-skins.min.css”> </head> <body class=”skin-blue sidebar-mini wysihtml5-supported”> <div id=’root’> </div> <script src=”https://code.jquery.com/jquery-3.1.1.min.js” integrity=”sha256-hVVnYaiADRTO2PzUGmuLJr8BLUSjGIZsDYGmIJLv2b8=” crossorigin=”anonymous”></script> <!– <script src=”/adminlte_app.js”></script> –> <!– <script src=”/public/adminlte_app.js”></script> –> <!– <script src=”assets/vendor.bundle.js”></script> –> <!– <script src=”http://localhost:3000/assets/vendor.bundle.js”></script> –> <!– <script src=”http://localhost:3000/vendor.bundle.js”></script> –> <!– <script src=”/vendor.bundle.js”></script> –> <script src=”vendor.bundle.js”></script> <!– <script src=”assets/bundle.js”></script> –> <!– <script src=”http://localhost:3000/assets/bundle.js”></script> –> <!– <script src=”http://localhost:3000/bundle.js”></script> –> <!– <script src=”/public/index.js”></script> –> <!– <script src=”/index.js”></script> –> <script src=”index.js”></script> <script src=”https://cdnjs.cloudflare.com/ajax/libs/datatables/1.10.15/js/jquery.dataTables.min.js”></script> <script src=”https://cdnjs.cloudflare.com/ajax/libs/datatables/1.10.15/js/dataTables.bootstrap.min.js”></script> </body> </html> |
再去运行:
➜ react-hot-boilerplate git:(master) ✗ npm run build > [email protected] build /Users/crifan/dev/dev_root/daryun/Projects/xxx/sourcecode/web/AdminManagement/reference/react-hot-boilerplate/react-hot-boilerplate > rm -rf build && mkdir -p build && cp index.html build && cross-env NODE_ENV=production webpack -p –progress –colors process.env.NODE_ENV=production, isProd=true Hash: 2993b4a31f252f080d48 Version: webpack 3.5.4 Time: 35360ms Asset Size Chunks Chunk Names index.js 1.12 MB 0 [emitted] [big] index vendor.bundle.js 11 kB 1 [emitted] vendor [207] (webpack)/buildin/module.js 521 bytes {0} [built] [237] (webpack)/buildin/global.js 823 bytes {0} [built] [303] ./src/index.js 467 bytes {0} [built] [392] ./src/App.js 15.3 kB {0} [built] [757] ./src/app.css 994 bytes {0} [built] [758] ./node_modules/css-loader!./src/app.css 439 bytes {0} [built] [762] multi react-hot-loader/patch ./src/adminlte_app.js 40 bytes {1} [built] [766] ./src/adminlte_app.js 22.6 kB {1} [built] + 759 hidden modules |
即可看到生成的两个文件:

然后再去把之前缺少的dist中的img图片拷贝到对应文件夹下,上传到服务器中:
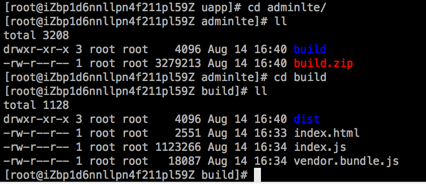
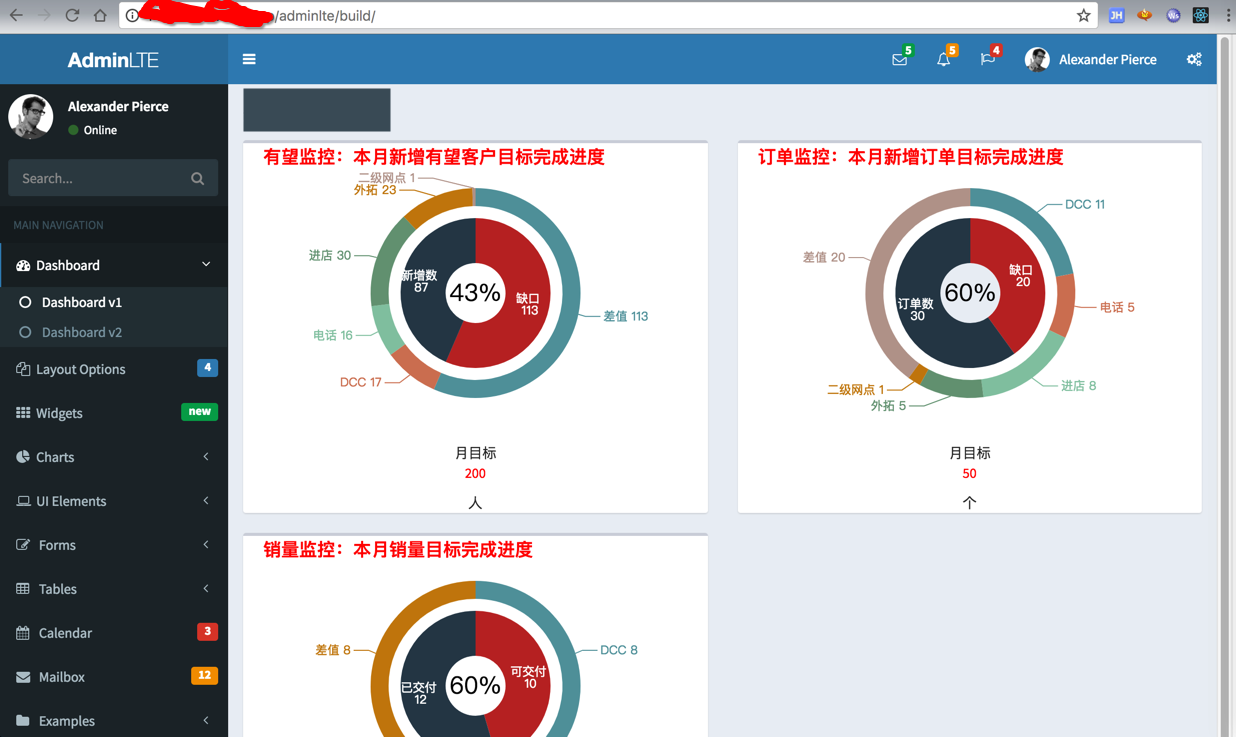
然后浏览器打开对应地址即可看到页面内容了:
所以,这样应该算是完整了:
把react-hot-boilerplate的项目(升级到最新的Webpack 3.x后,且升级到最新的webpack-dev-server后),添加了production的模式,可以打包输出到生产环境中了。